By: Joe, linwoodxxx@hotmail.com
I've found 2 different types of motors. One has a metal coil that supplies the power when wound up, and the other doesn't have this, but uses springs that use the motors to slow down the recoil.
 I will describe how to fix the "coiled" motor, because these are the only ones that I have had problems with. All that is needed are - very small slotted screwdriver or exacto blade, super glue, and maybe pliers. I will be referencing a Starwolf motor, which I have noticed to be smaller than others I have worked on. Others include 2 Starhawk's, H.A.R.V.-7, and the 2 motors in the Blast Track. So I'm not an expert yet, but I do know what I am doing. (Sample H.A.R.V.-7 motor was supplied by Ken Sullivan, pageman34@aol.com)
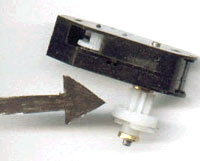
- First, a diagram of the motor and the main parts - sometimes a gear is located in the way of the side that needs to be removed. In that case, use the pliers to remove it, being careful not to dent up the plastic teeth.
- Next, pry up the side opposite of the coil section, trying to keep in mind the order of the gears (this may make it easier to reassemble). The motor I am working on has 4 gears, where as others I have worked on only had 3. Take off the whole section, remove the gears leaving the spiral on the rod, and pull out the coil, not removing it from the post.
- The spiral slipping on the rod is why the motor fails, so this is where the glue goes. I've used jet instant glue and another kind before, so any kind may work. make sure the top gear is removed from the spiral and slide the spiral up the rod about 1/16th of an inch. Use a toothpick to get some glue and very sparingly apply it to the bottom of the spiral on the rod. Slide the spiral down the rod into the glue to its original position. Now, apply glue to the top of the spiral on the rod and capillary action will suck the glue down.
- That's the easy part, now the hard, reassembly. I would recommend letting the glue set for a few hours so that it completely sets up, but its not always necessary. Put the top gear back on and the other gears into position, tweezers help, and line up holes of the bottom and middle sections. Then carefully slide the top section back on. Make sure all of the posts of the gears go into the correct holes.
- Lastly, wind up the motor until the coil winds back in. Keep winding for a little while and let go to see your motor come back to life. If it doesn't unwind correctly, it means the glue didn't hold up correctly, probably not enough glue. If this occurs, simply repeat all the steps to make everything better.
Joe, linwoodxxx@hotmail.com